Wednesday, December 21, 2011

Day 25 of 25 Christmas Crafts

WOW- this is the last Christmas Craft for 2011!

Today, we made ice cream cone Christmas trees! First, I collected everything that we needed for the craft, ice cream cones (the actual cone ones, not the ones with flat bottoms- for obvious reasons!), green icing (I put it in ziploc bags and cut the corner out so it was easier for the kids to use), and then different candies to put on them. I separated all of the candies into enough bowls for each child (4 kids, 4 bowls full of different types of candies, so there was no fighting over who had what- they were all the same!).


 Then, the kids put their icing on their trees. 


And then they started decorating them! 


And now, they can't wait to eat them! 

Tuesday, December 20, 2011

Days 22-24 of 25 Christmas Crafts

So, I was not feeling well, and did not get the other crafts posted last week. So, I am putting them all in one post!

Craft 22 was making foam picture ornaments. I sort of cheated on this one, I bought the package from Oriental Trading. Then printed out some pictures of the kids and had them make the ornaments. I can't show too many pictures of these because they are being used as gifts. But here is a picture of the ornaments.


 Craft 23 was making placemats for Santa's cookies. This can be a quick and easy activity or could involve more work. Since I wasn't feeling well, we did the really easy route, we coloured them. I basically just drew 2 circles on a piece of paper, one smaller than the other. In the bigger circle I wrote "Cookies for Santa" and the smaller was "Milk for Santa". I also drew one big carrot on one of the placemats and wrote "Carrot for Rudolph" and on the other placemat I did 8 small carrots and wrote "Carrots for the reindeer". (I had one placemat for each child!). Then, I let them colour! 

 Once they were done colouring we covered the paper with packing tape, so we can lay out the cookies, milk and carrots right on top! 


Craft 24 is bird feeders. We thought that it would be nice to make a present for the neighbourhood birds. 

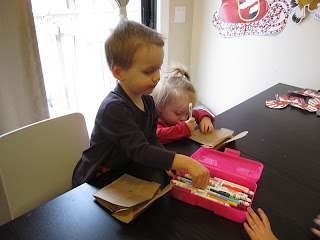
First I collected everything we needed, an empty toilet paper roll (with all the bits peeled off), a bowl of peanut butter and spoon, a plate filled with bird seed, and string. I also used the hole punch to punch holes in the toilet paper roll. 


 The kids strung the string through the toilet paper roll, and then we tied it, so we can hang it from the tree. Then we covered the toilet paper roll with peanut butter.


Once it was all coated, we laid it down on the plate full of bird seed. The kids rolled it, and put the bird seed on it, until it was covered!


Then, you can hang it in the tree! 


Wednesday, December 14, 2011

Day 21 of 25 days of Christmas Crafts

Today, we made gift bags for the gifts that we made yesterday- or they were supposed to be, but the frames didn't quite fit with the handprints on them. I had seen these gift bags a long time ago, and had no idea where the people got the idea from, but thought it was great. Then with Danika's fascination with Rudolph this year, I decided to look and see if I could find them, and I did, thanks to pinterest. I followed some pins back to this.  I am on that site all the time and have never come across them. 

Anyways- I didn't quite cut out the bag the same way, I made the ears out of the sides of the bag, but either will do! I had to cut the bags first, and then get everything ready that we needed. Markers, glue, cut the antlers, and of course the bags. BUT because we were using these for a gift, and the gift was too big, we had to make another gift too- which we did using these other materials but I can't say because the gift recipients are reading this! But you could put anything in them! 


The kids basically just coloured the reindeer bag and glued on the antlers, but they had fun making the whole gift for their special people! 


Tuesday, December 13, 2011

Day 20 of 25 Christmas Crafts

WOW- we only have 5 Christmas Crafts left! I can't believe it is almost that time of year!

Today we made gifts for parents/grandparents. They are reindeer picture frames, on a CD case so they will stand up!

First I collected everything we needed, the CD cases, white finger paint paper, brown paint, glue, googly eyes, and a pom pom for the nose.

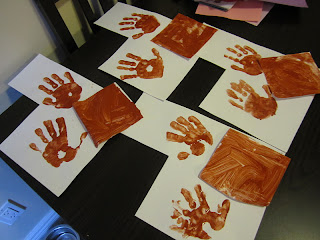
The first thing we had to do was to paint each child's hands, and also the background for the picture- all painted brown.


Then, after that dries, we put it all together. We started by gluing the brown background onto the front of the CD case.

Then the handprint antlers.
Followed by the picture- the easies way to do this is to flip the picture and put the glue on the back of the picture!

Once the picture was on, we glued on the googly eyes, and the pom pom nose!

When you give the frame, show the recipient that you can open the case, so it stands up! 


Monday, December 12, 2011

Day 19 of 25 Days of Christmas Crafts

Today we did another handprint craft, but Santa this time. 

First I collected everything that we needed to do the craft, red and white paper, markers, glue, googly eyes, and cotton balls. I did cut out a hat and coat shape from the red paper. 

Then we traced out the kids hands, and set to work! 

 The kids decorated the hat with the cotton balls.
 Then we glued on the googly eyes. 
 And then glued on the shirt. Then the kids coloured their santa! 


Thursday, December 8, 2011

Day 18 of 25 Christmas Crafts and Free Craft Thursday

So, today, we did 2 crafts. It was Free Craft thursday, and I already had an easy craft ready for the kids to do. But, tomorrow will be a bit different for us, so we did the craft today.

Our first Craft, for Free Craft Thursday was to decorate foam stockings. We had markers and stickers. We also wrote the kids name on them, and they were able to just do what they wanted!


And then for Craft #18, we made handprint reindeer. Again, something really easy, and the kids could use what ever items they wanted. Today, they decided to use markers and glitter glue. 

First I traced each childs hand and cut them out. 

Then the kids decorated their reindeer, and we added a face and hooves.

Once the decorating was done, we used glitter glue to make a shiny red nose for them! 

Then we have the reindeer- Danika decided hers was a zebra reindeer, and Bryce got bored of colouring and moved on! 

Also today, we made a reindeer House to put on our front closet. I cut out the pieces and then the kids helped glue it together, and then tape it to the front closet. This is what we were left with. 
(idea modified from an image on pinterest)


Wednesday, December 7, 2011

Day 17 of 25 Christmas Crafts

Todays craft was a bit difficult, but we did it! I had to help each child one on one to get it to work, but that is because I choose the harder of the two choices! 

We made candy cane reindeer, but instead of the regular 1 candy cane, we used 2. So, it was a bit tougher. You can follow the same steps using one candy cane to make it a bit easier! 

First I collected everything we needed- candy canes, pipe cleaners, bells, googly eyes, a smartie for the nose, and glue. 
Then we put the two candy canes beside each other and wrapped the pipe cleaner half way up the two of them. Then added the bell, and kept going. 

After the body was done, we did the antlers. Just by twisting the pipe cleaner around the hook of the candy cane! 
Then we glued on the eyes and nose! 
These are great to use as ornaments, to stick on gifts, or just as a snack later! (don't eat the smartie though!)


Tuesday, December 6, 2011

Day 16 of 25 Christmas Crafts

Today, we did a craft that I believe most people have seen before. We do this every year and keep them, to see how the kids have grown. Handprint and footprint reindeer are so much fun to make, and a great keep sake- they also make great gifts- we make them into ornaments! And, you can add so many things to this craft! 

For some reason I do not have many pictures. I guess maybe it was Bryce with his hands painted, and a glue bottle! 

First I collected everything we needed. Paper- you can use brown paper, or white and then colour/paint it- we used brown today. Then some black or brown paint, glue, markers, a red pom pom (you can use red sparkles too)- for the nose, and ribbon to make an ornament (not pictured)


Then we traced the kids foot- you can leave socks on, because you don't need the toes outlined. Then, we painted both hands, and stamped them on the paper.

While the hand prints are drying, you can finish with the foot print. Draw on some eyes, and what ever else the kids want to add, and glue on the nose (pom pom).


Once the handprints are dry, have the kids glue them to the top of the foot print (head). 


Monday, December 5, 2011

Day 15 of 25 Christmas Crafts

Today, I started out with one basic craft idea, and then it morphed into something else. So, the first picture doesn't have everything we used, but I will add what else we put into it! 

We were making basic thumb print reindeer, but, then the idea morphed into the 8, sorry 9 reindeer pulling Santa's sleigh! 

First I got out some finger painting paper, brown paint, a paint brush, and some markers. (not pictured is the sleigh I cut out of red paper, and the santa sticker, and glue). 

 I did the kids thumb prints with brown paint first- and let those dry. I did 2 thumb prints per reindeer- one for the head and one for the body. 

Then we stuck on the Santa sticker- on the sleigh. And coloured that! 

 Then, once the thumb prints were dry, we drew antlers, faces, feet and tails on each reindeer, and coloured it. 


 Then we glued the sleigh onto the reindeer paper. And then we had Dasher, Dancer, Prancer, Vixen, Comet, Cupid, Donder and Blitzen---oh yeah, and most important- Rudolph, pulling Santa's sleigh!